How to customize your Arduino Cloud IoT dashboards on the go

The Arduino Cloud has long been a trusted platform for makers, engineers, and developers to manage their IoT projects with ease. From tracking sensor data to automating smart devices, the cloud enables seamless connectivity. Complementing this, the Arduino IoT Remote mobile app gives users the power to monitor and interact with their dashboards from anywhere. […]

The post How to customize your Arduino Cloud IoT dashboards on the go appeared first on Arduino Blog.

The Arduino Cloud has long been a trusted platform for makers, engineers, and developers to manage their IoT projects with ease. From tracking sensor data to automating smart devices, the cloud enables seamless connectivity. Complementing this, the Arduino IoT Remote mobile app gives users the power to monitor and interact with their dashboards from anywhere. Now, we’re excited to announce a new feature that enhances your experience even further: the ability to change dashboard layouts directly through the mobile app!

Let’s dive into this exciting new update, along with some other minor features recently added to improve your experience.

Change your dashboard layouts from the IoT Remote app

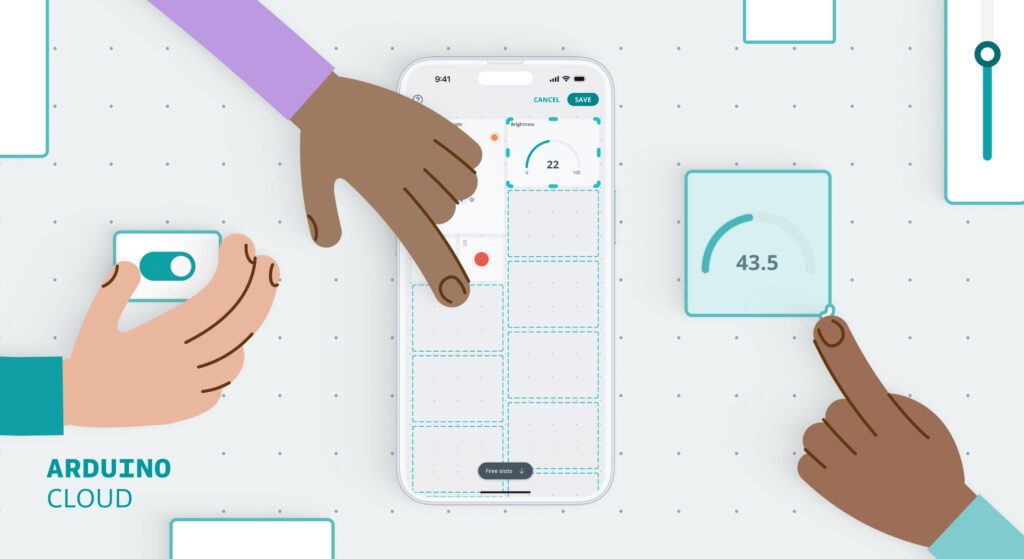
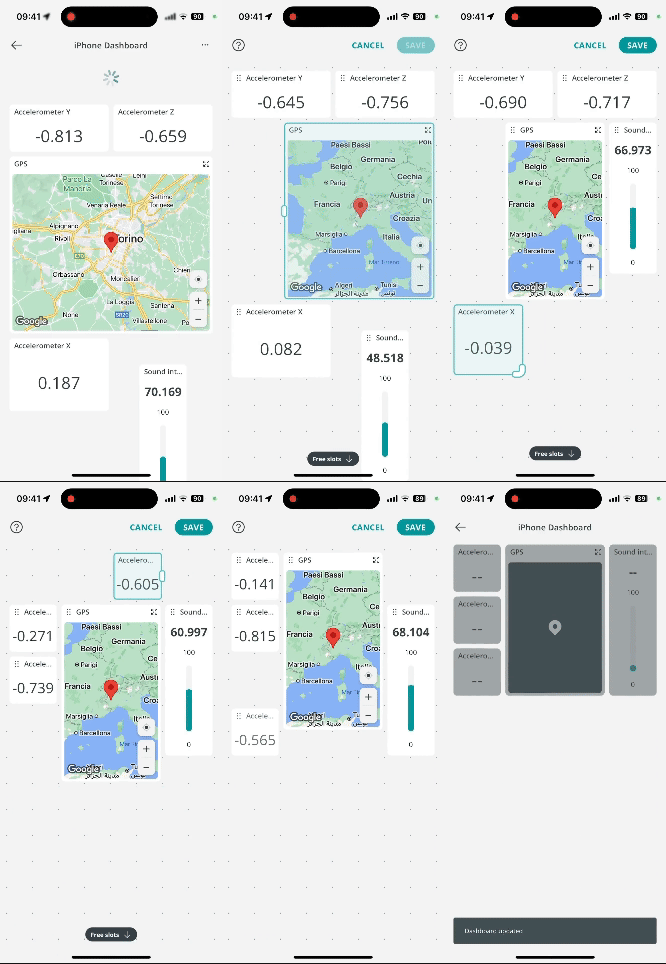
Previously, modifying or rearranging the layout of your IoT dashboards was only possible through the browser on a PC. While this worked well for desktop users, it wasn’t convenient for those who needed to make changes on the go. With the latest update, you can now modify the “mobile view” of your dashboard directly through the Arduino IoT Remote app.

It’s important to note that Arduino Cloud dashboards have two distinct views: mobile and desktop. This new feature allows you to customize the layout specifically for your mobile devices, without affecting the desktop version. So whether you’re monitoring your projects on your phone or tablet, you can now optimize the layout for a mobile-friendly experience.

By customizing the mobile view, you gain more control over how your data is displayed and interacted with on your phone—perfect for users who need a quick overview and control of their IoT systems while away from their desktops.

How to use the new layout feature

Using this new feature is simple. Here’s how you can rearrange your dashboard layout in the IoT Remote mobile app:

1. Open the Arduino IoT Remote app and log into your account.
2. Navigate to the dashboard you want to modify.
3. On the Settings menu of the dashboard, tap the Rearrange button.
4. Select a widget by clicking on it, and move it around the dashboard to the new location or change its size.
5. Click on CANCEL to discard your changes or on SAVE to save your changes, and your updated layout will be visible across all your mobile devices.
What else is new on the IoT Remote app? 

In addition to the layout customization feature, during the past months we’ve introduced several minor updates to make your app experience even smoother:

  • Sync dashboard cover image: Now, you can set a cover image for your dashboard, and it will automatically sync across all your devices. Whether for branding, personalization, or easy recognition, this feature ensures visual consistency on every device you use.
  • Disable trigger from Notification Detail: You can now enable or disable a trigger directly from the Notification Detail screen. This feature provides quick control over automated actions, helping you fine-tune your project with minimal hassle.
  • Clear notifications via the Activity Manage Panel: Keep your notifications organized by clearing them all from the new Activity Manage Panel. This helps you stay focused by removing unnecessary clutter from your feed.

Install the Arduino IoT Remote on your mobile phone

These new features make it easier than ever to stay on top of your IoT projects from anywhere with your mobile phone. Whether you’re monitoring, controlling, or tweaking your dashboard, the Arduino IoT Remote app is the perfect tool for the job, and it’s free!Ready to experience these new updates? Download the Arduino IoT Remote app today from the App Store or Google Play and take full control of your IoT projects from the convenience of your mobile device.

The post How to customize your Arduino Cloud IoT dashboards on the go appeared first on Arduino Blog.
Arduino Nicla Sense Env: adding advanced environmental sensing to a broad range of applications

We’re thrilled to announce the launch of Nicla Sense Env: the latest addition to our portfolio of system-on-modules and sensor nodes, empowering innovators with the tools to unlock new possibilities. This tiny yet powerful sensor node is designed to elevate your environmental sensing projects to new heights. Whether you’re a seasoned professional or just starting […]

The post Arduino Nicla Sense Env: adding advanced environmental sensing to a broad range of applications appeared first on Arduino Blog.
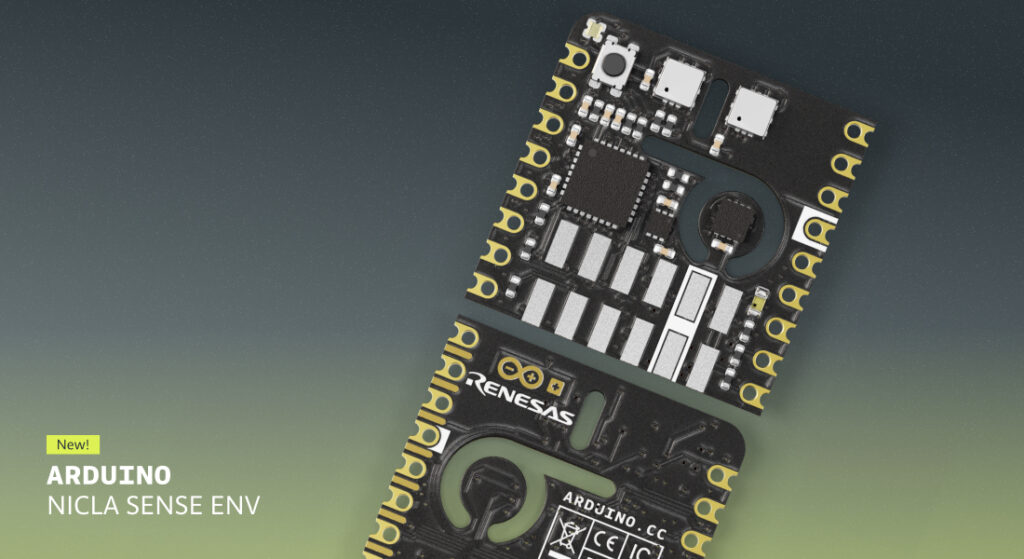
We’re thrilled to announce the launch of Nicla Sense Env: the latest addition to our portfolio of system-on-modules and sensor nodes, empowering innovators with the tools to unlock new possibilities. This tiny yet powerful sensor node is designed to elevate your environmental sensing projects to new heights. Whether you’re a seasoned professional or just starting your journey with Arduino, Nicla Sense Env is here to help sense the world around you with precision and ease.

“With Nicla Sense Env, we’re taking a critical step toward addressing one of the most pressing challenges of our time: protecting the environment. This powerful module allows developers to monitor air quality and environmental conditions with precision, paving the way for smarter, more sustainable solutions. By equipping professionals, educators, and makers with the right tools, we’re helping to build a future where technology and environmental stewardship go hand in hand. The compact nature of the Nicla form factor broadens the number of possible applications, spanning from prototyping to testing and volume production for OEMs.” – Fabio Violante, CEO of Arduino

“Renesas is proud to be the technology supplier of choice for the Arduino Nicla Sense Env, the new modular board to measure real-time indoor air quality, temperature, and humidity at the edge of the IoT network. Renesas’ system architecture, based on the RA2E1 microcontroller and environmental industrial-grade sensors with onboard AI including the ZMOD4410, ZMOD4510 and HS4001, enables Nicla Sense Env to be deployed in a variety of smart building applications, HVAC and air purifier systems, gas leak detection systems, fumes and fire detection systems, and smart city air quality management, with little integration effort.”
— Brad Rex, Senior Director of Global Systems and Solutions Team at Renesas

Compact yet capable: let’s unpack the features

Nicla Sense Env might be small in size, but it’s packed with advanced features that make it a powerhouse for environmental monitoring.

  • Monitor indoor and outdoor environments with AI-ready Renesas sensors. Nicla Sense Env offers temperature and humidity monitoring through the HS4001 sensor and AI-enabled gas detection with the ZMOD4410AI1V and ZMOD4510AI1V sensors. These provide real-time data on air quality, including the detection of TVOCs, NO2, O3, and other gasses, both indoors and outdoors.
  • 22.86 x 22.86 mm = huge potential. With the tiny form factor the Nicla family is known for, Nicla Sense Env can easily fit into any project, allowing you to integrate environmental sensing without compromising on space or design.
  • Robust, reliable, and ready to stand the test of time. Built with industrial-grade sensors, Nicla Sense Env is engineered for durability and accuracy, ensuring reliable performance even in challenging conditions. What’s more, it was designed for 24/7 operation: ultra-low power consumption makes it ideal for long-term deployments in any situation. 
  • Fits right in, with seamless integration and wide compatibility. Whether you’re working with Portenta SOMs or MKR products, Nicla Sense Env connects effortlessly via ESLOV (I2C) or header pins. It’s also compatible with Arduino IDE and MicroPython, so you can start programming right out of the box. And of course, it works great with a variety of libraries and tutorials available through the Arduino ecosystem.

Real-world applications? We sense endless possibilities!

Nicla Sense Env is a versatile and accessible tool for environmental monitoring: it’s your new ally whether you’re developing something new or enhancing an existing project, working on a prototype or full-fledged industrial-scale solution.

Nicla Sense Env fits perfectly into HVAC systems, helping you monitor air quality, humidity, and temperature to keep smart buildings comfortable and compliant with environmental regulations. In air purifiers, it provides real-time data that allow for energy-efficient operation and better air quality by detecting harmful gasses and adjusting the system as needed. When it comes to safety, it can play a critical role in detecting fumes and smoke, triggering early warnings to prevent potential hazards both indoors and outdoors. In industrial settings, it can monitor air quality and detect toxic substances, ensuring that machinery runs safely and efficiently. And these are only the first examples of applications that come to mind! 

Add a breath of fresh air to your projects

We look forward to seeing how you will leverage the capabilities of the Arduino Nicla Sense Env to create innovative solutions – whether you’re developing climate control systems, enhancing air quality monitoring, or ensuring safety in industrial environments.

So, head to the Arduino Store to check out full product details and specifications, and let’s continue to push the boundaries of innovation together – one “tiny” step at a time!

The post Arduino Nicla Sense Env: adding advanced environmental sensing to a broad range of applications appeared first on Arduino Blog.
Arduino Nicla Sense Env: adding advanced environmental sensing to a broad range of applications

We’re thrilled to announce the launch of Nicla Sense Env: the latest addition to our portfolio of system-on-modules and sensor nodes, empowering innovators with the tools to unlock new possibilities. This tiny yet powerful sensor node is designed to elevate your environmental sensing projects to new heights. Whether you’re a seasoned professional or just starting […]

The post Arduino Nicla Sense Env: adding advanced environmental sensing to a broad range of applications appeared first on Arduino Blog.
We’re thrilled to announce the launch of Nicla Sense Env: the latest addition to our portfolio of system-on-modules and sensor nodes, empowering innovators with the tools to unlock new possibilities. This tiny yet powerful sensor node is designed to elevate your environmental sensing projects to new heights. Whether you’re a seasoned professional or just starting your journey with Arduino, Nicla Sense Env is here to help sense the world around you with precision and ease.

“With Nicla Sense Env, we’re taking a critical step toward addressing one of the most pressing challenges of our time: protecting the environment. This powerful module allows developers to monitor air quality and environmental conditions with precision, paving the way for smarter, more sustainable solutions. By equipping professionals, educators, and makers with the right tools, we’re helping to build a future where technology and environmental stewardship go hand in hand. The compact nature of the Nicla form factor broadens the number of possible applications, spanning from prototyping to testing and volume production for OEMs.” – Fabio Violante, CEO of Arduino

“Renesas is proud to be the technology supplier of choice for the Arduino Nicla Sense Env, the new modular board to measure real-time indoor air quality, temperature, and humidity at the edge of the IoT network. Renesas’ system architecture, based on the RA2E1 microcontroller and environmental industrial-grade sensors with onboard AI including the ZMOD4410, ZMOD4510 and HS4001, enables Nicla Sense Env to be deployed in a variety of smart building applications, HVAC and air purifier systems, gas leak detection systems, fumes and fire detection systems, and smart city air quality management, with little integration effort.”
— Brad Rex, Senior Director of Global Systems and Solutions Team at Renesas

Compact yet capable: let’s unpack the features

Nicla Sense Env might be small in size, but it’s packed with advanced features that make it a powerhouse for environmental monitoring.

  • Monitor indoor and outdoor environments with AI-ready Renesas sensors. Nicla Sense Env offers temperature and humidity monitoring through the HS4001 sensor and AI-enabled gas detection with the ZMOD4410AI1V and ZMOD4510AI1V sensors. These provide real-time data on air quality, including the detection of TVOCs, NO2, O3, and other gasses, both indoors and outdoors.
  • 22.86 x 22.86 mm = huge potential. With the tiny form factor the Nicla family is known for, Nicla Sense Env can easily fit into any project, allowing you to integrate environmental sensing without compromising on space or design.
  • Robust, reliable, and ready to stand the test of time. Built with industrial-grade sensors, Nicla Sense Env is engineered for durability and accuracy, ensuring reliable performance even in challenging conditions. What’s more, it was designed for 24/7 operation: ultra-low power consumption makes it ideal for long-term deployments in any situation. 
  • Fits right in, with seamless integration and wide compatibility. Whether you’re working with Portenta SOMs or MKR products, Nicla Sense Env connects effortlessly via ESLOV (I2C) or header pins. It’s also compatible with Arduino IDE and MicroPython, so you can start programming right out of the box. And of course, it works great with a variety of libraries and tutorials available through the Arduino ecosystem.

Real-world applications? We sense endless possibilities!

Nicla Sense Env is a versatile and accessible tool for environmental monitoring: it’s your new ally whether you’re developing something new or enhancing an existing project, working on a prototype or full-fledged industrial-scale solution.

Nicla Sense Env fits perfectly into HVAC systems, helping you monitor air quality, humidity, and temperature to keep smart buildings comfortable and compliant with environmental regulations. In air purifiers, it provides real-time data that allow for energy-efficient operation and better air quality by detecting harmful gasses and adjusting the system as needed. When it comes to safety, it can play a critical role in detecting fumes and smoke, triggering early warnings to prevent potential hazards both indoors and outdoors. In industrial settings, it can monitor air quality and detect toxic substances, ensuring that machinery runs safely and efficiently. And these are only the first examples of applications that come to mind! 

Add a breath of fresh air to your projects

We look forward to seeing how you will leverage the capabilities of the Arduino Nicla Sense Env to create innovative solutions – whether you’re developing climate control systems, enhancing air quality monitoring, or ensuring safety in industrial environments.

So, head to the Arduino Store to check out full product details and specifications, and let’s continue to push the boundaries of innovation together – one “tiny” step at a time!

The post Arduino Nicla Sense Env: adding advanced environmental sensing to a broad range of applications appeared first on Arduino Blog.
This perplexing robotic performer operates under the control of three different Arduino boards

Every decade or two, humanity seems to develop a renewed interest in humanoid robots and their potential within our world. Because the practical applications are actually pretty limited (given the high cost), we inevitably begin to consider how those robots might function as entertainment. But Jon Hamilton did more than just wonder, he actually built […]

The post This perplexing robotic performer operates under the control of three different Arduino boards appeared first on Arduino Blog.

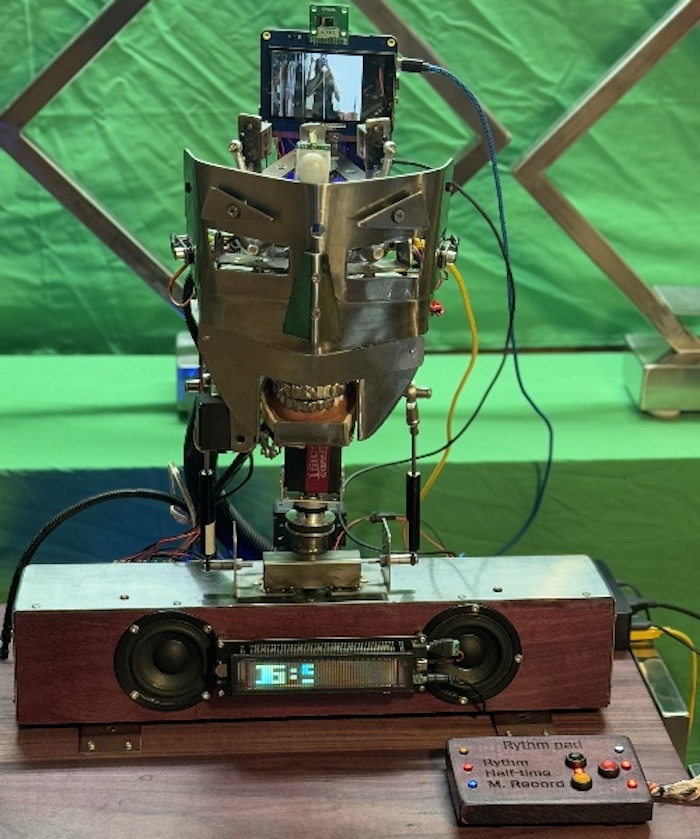
Every decade or two, humanity seems to develop a renewed interest in humanoid robots and their potential within our world. Because the practical applications are actually pretty limited (given the high cost), we inevitably begin to consider how those robots might function as entertainment. But Jon Hamilton did more than just wonder, he actually built a robotic performer called Syntaxx and it will definitely make you feel things.

It is hard to describe this robot without sounding like a Mad Libs game filled out by a cyberpunk-obsessed DJ. Hamilton designed it to give performances, primarily in the form of synthetic singing accompanied by electronic music. It looks like a crude Halloween mask given life by a misguided wizard sometime in the 1980s. It is pretty bonkers and you should probably watch the video of it in action to wrap your head around the concept.

Hamilton needed three different Arduino development boards to bring this robot to life. The first, an Arduino Giga R1 WiFi, oversees the robot’s operation and handles voice interaction, as well as audio playback. The second, an Arduino Mega 2560, moves the robot’s neck according to input from two microphones (one on the left, the other on the right). The third, an Arduino Uno R4 WiFi, controls the rest of the servo movement. 

The result is a robot that is both impressive and also pretty disconcerting. 

The post This perplexing robotic performer operates under the control of three different Arduino boards appeared first on Arduino Blog.
Top Arduino Cloud IoT dashboard ideas with the new Image widget 

Recently, we announced the exciting new Image widget for Arduino Cloud. This powerful feature opens up a world of possibilities for enhancing your IoT dashboards. But the true potential of the Image widget lies in the applications that you create. Today, we’re excited to dive deeper and show you what kind of IoT dashboards your […]

The post Top Arduino Cloud IoT dashboard ideas with the new Image widget  appeared first on Arduino Blog.

Recently, we announced the exciting new Image widget for Arduino Cloud. This powerful feature opens up a world of possibilities for enhancing your IoT dashboards. But the true potential of the Image widget lies in the applications that you create.

Today, we’re excited to dive deeper and show you what kind of IoT dashboards your can create with the Image widget. Whether you’re using it for smart homes, enterprise solutions, or educational tools, the possibilities are endless—and we’re here to help you discover its full potential!

As a maker, the Image widget can be a game-changer for your smart home projects. Here are a few examples: 

1. Home security dashboard: Detect intrusion with camera photos

Here’s our first IoT dashboard idea: Display live snapshots from a home-made security camera, updating the image at regular intervals or triggering updates based on motion or sound detection. This allows you to keep a close eye on your property, even when you’re away. You can control the whole system from an Arduino Cloud dashboard.

In this project, you’ll learn how to build a security system using the Arduino Nicla Vision‘s camera. The system captures snapshots when it detects sound levels above a set threshold, and everything is managed through an Arduino Cloud dashboard. From enabling or disabling the system, viewing event history, to receiving alerts, Arduino Cloud makes it easy to control and monitor your security setup. Check out the full project for all the details and step-by-step instructions!

IoT dashboard idea on Arduino Cloud. Use the image widget to detect intrusion with camera photos

Image 1: Arduino Cloud intrusion detection dashboard with snapshot of a living room

2. Plant visual growth diary dashboard

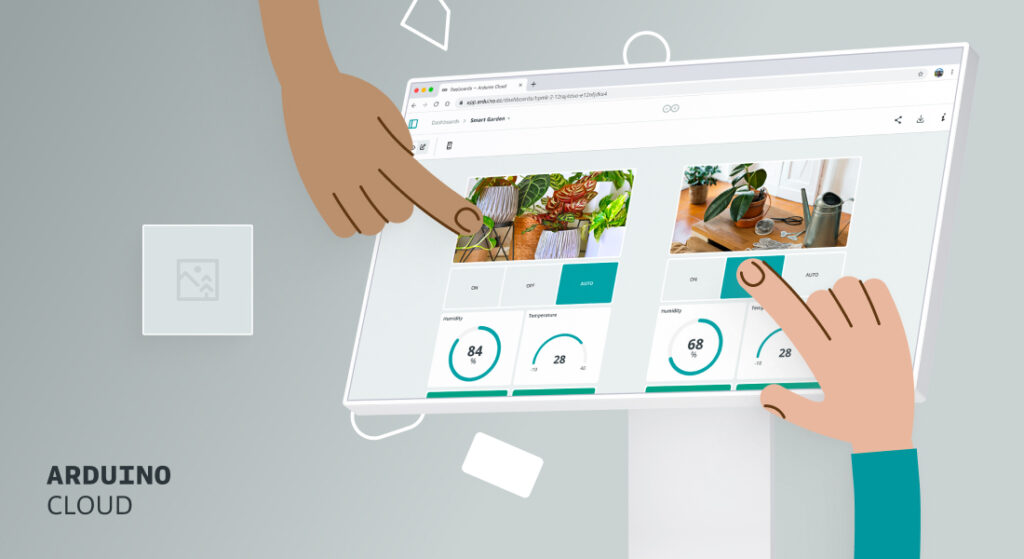
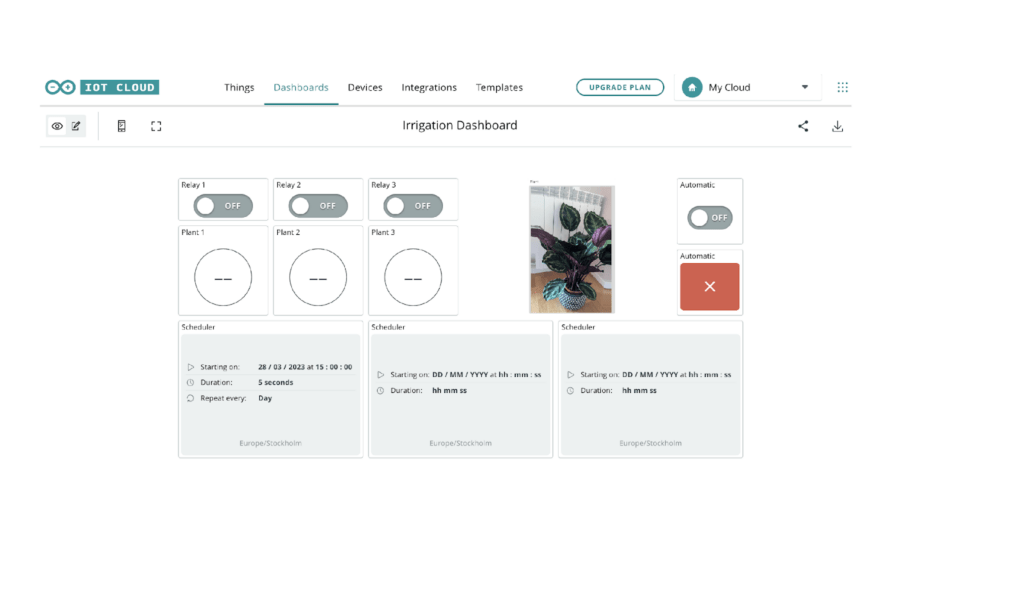
In this second IoT dashboard idea, you can bring your indoor or outdoor garden into the digital realm. Use the Image widget to create a visual growth diary, displaying daily or weekly photos of your plants. Combine this with soil moisture sensors to get a comprehensive view of your plants’ health and progress over time.

IoT dashboard idea on Arduino Cloud: Visual growth diary of your plant

Image 2: Arduino Cloud irrigation dashboard with snapshot of a plant

NOTE: This dashboard above is based on this original project and has been modified to include the Image widget. These adjustments were made to demonstrate the potential of this new feature in enhancing your Arduino Cloud dashboards. 

3. DIY Weather station dashboard with outside daily photos

In this 3rd example, you can turn your Arduino-powered weather station into a visually engaging dashboard. That’s right, display real-time weather icons and images of the current sky conditions. You can even integrate sensor data to provide a complete picture of your local microclimate, making your DIY weather station a must-have for any maker’s smart home.

IoT dashboard idea: Weather station on Arduino Cloud with image widget

Image 3: Local weather station Arduino Cloud dashboard with daily photo

NOTE: This IoT dashboard idea above is based on this original project and has been modified to include the Image widget. These adjustments were made to demonstrate the potential of this new feature in enhancing your Arduino Cloud dashboards.

By adding a camera, following the instructions of the intrusion detection project described in the first IoT dashboard idea above, you can take your weather dashboard to the next level.

4. More ideas to use the Image Widget in your Arduino Cloud IoT dashboards

The new Cloud image widget offers powerful ways to integrate real-time imagery into your data-driven workflows. Below are five additional examples of how the Image widget can enhance your Arduino Cloud

5. Industrial equipment monitoring: Embed real-time visuals of critical machinery, like thermal imaging data, in your dashboard to quickly identify and address potential issues.

6. Smart agriculture: Integrate drone or satellite imagery to monitor crop growth, soil conditions, and irrigation systems, helping make data-driven decisions for your farm.

7. Supply chain visualization: Create interactive maps displaying the real-time location and status of products and materials, while tracking inventory levels and shipment progress.

8. Quality control: Compare images of acceptable and defective products to enhance visual inspections and streamline quality control processes.

9. Education: Use real-time or time-lapse visuals to bring live science experiments into digital learning, enriching students’ engagement with STEM subjects.

Community Spotlight

We’re excited to see what you, our innovative Arduino community, will create with the Image widget. Share your projects and ideas on the Arduino Project Hub or in the Arduino Cloud forum, and inspire others with your creative applications. Who knows, you might just end up being featured in our next Community Spotlight!

Conclusion

The Image widget is more than just a pretty face — it’s a powerful tool that can transform the way you approach IoT projects, whether you’re a maker, an enterprise, or an educator. By unleashing your creativity and leveraging this feature, you can breathe new life into your dashboard or create new breeds of projects.

So, what are you waiting for? Sign up for Arduino Cloud for free today, start exploring the Image widget and let your imagination run wild. The possibilities are endless, and we can’t wait to see what you create. For more information and tutorials, check out the Arduino Cloud documentation.

The post Top Arduino Cloud IoT dashboard ideas with the new Image widget  appeared first on Arduino Blog.

This automatic laser turret keeps the cats entertained for hours

Cats may be adorable, but they evolved to be predators. Unfortunately, responsible owners keep their cats indoors to avoid decimating the local wildlife population and that means Mr. Whiskers and Ms. Socks don’t get much opportunity to express their hunting urges. That’s why Sascha at Small Batch Factory designed Gatoino, which is an automatic laser […]

The post This automatic laser turret keeps the cats entertained for hours appeared first on Arduino Blog.

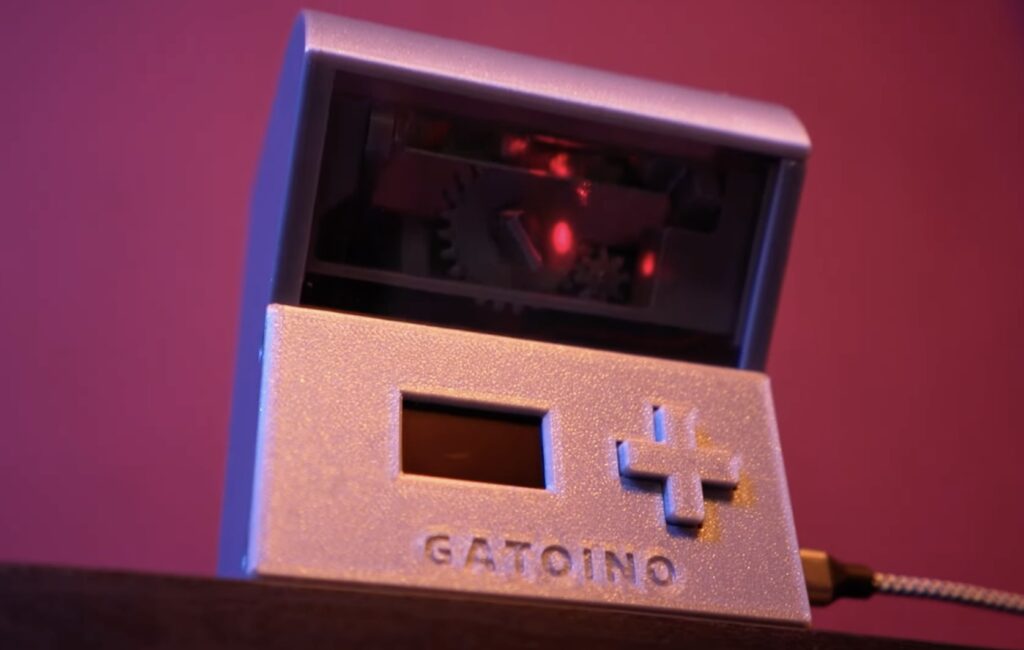
Cats may be adorable, but they evolved to be predators. Unfortunately, responsible owners keep their cats indoors to avoid decimating the local wildlife population and that means Mr. Whiskers and Ms. Socks don’t get much opportunity to express their hunting urges. That’s why Sascha at Small Batch Factory designed Gatoino, which is an automatic laser turret toy that lets cats hunt for red dots indefinitely.

Gatoino automates laser cat toy playtime, putting less strain on owners’ wrists and keeping the fun going for as long as the furry felines want to keep up the chase. It moves the laser dot in two axes and does so in an unpredictable (pseudo-random) way, so it will keep the cats on their toe beans. And an onboard control interface lets the human adjust the playing field size and the movement speed, along with session schedules.

An Arduino Nano board controls all of that through a custom PCB to keep the wiring tidy. It moves the laser using two small SG90 hobby servo motors in an arrangement similar to a mirror galvanometer. Those parts all fit into a simple 3D-printed enclosure that can be placed on a shelf or mounted onto a wall out of the way.

If you’re interested in building your own Gatoino, the design files and instructions are available for purchase on the Small Batch Factory website.

The post This automatic laser turret keeps the cats entertained for hours appeared first on Arduino Blog.

This 3D-printed robotic arm can be built with just a few inexpensive components

Robotics is already an intimidating field, thanks to the complexity involved. And the cost of parts, such as actuators, only increases that feeling of inaccessibility. But as FABRI Creator shows in their most recent video, you can build a useful robotic arm with just a handful of inexpensive components. This is pint-sized robotic arm that […]

The post This 3D-printed robotic arm can be built with just a few inexpensive components appeared first on Arduino Blog.

Robotics is already an intimidating field, thanks to the complexity involved. And the cost of parts, such as actuators, only increases that feeling of inaccessibility. But as FABRI Creator shows in their most recent video, you can build a useful robotic arm with just a handful of inexpensive components.

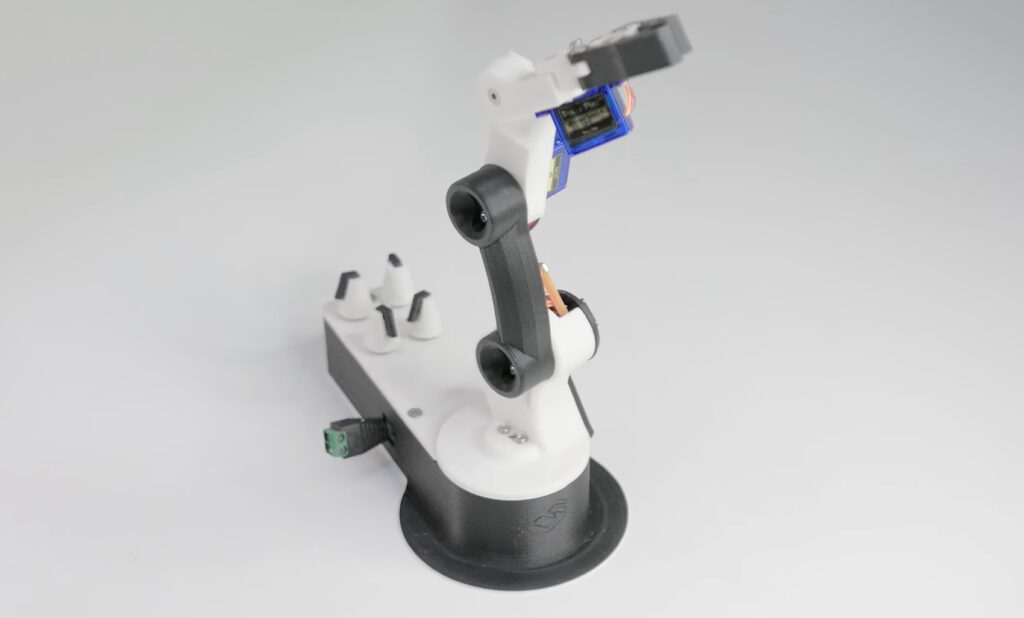
This is pint-sized robotic arm that has some of the same features as big and expensive industrial robots, just on a smaller scale. Users can operate the four joints manually, but can also record a series of positions and let the robot automatically move from one to the next. That is a popular programming technique in many industries, making this robot useful for learning real methodology and for performing practical tasks.

The best part is that this robot is very affordable. All of the parts, with the exception of fasteners and electronic components, are 3D-printable. The electronic components include an Arduino Nano board and four SG90 hobby servo motors that can be found for just a couple of dollars each. FABRI Creator designed a custom PCB to host the Arduino, to provide power input, and to simplify the wiring. That PCB isn’t strictly necessary, but it results in a much tidier robot. 

The assembled robot is small, but has enough reach to be useful and enough strength to lift light objects. It is a perfect starting point for people who want to learn robotics basics on a budget.

The post This 3D-printed robotic arm can be built with just a few inexpensive components appeared first on Arduino Blog.

Marble art madness from a marvelous machine

Marbles are underrated. They’re very round, roll well, tend to be pretty shiny, and come in all sorts of neat colors. That last characteristic makes them suitable for artwork, like orbicular pixels. In his most ambitious project to date, Engineezy took advantage of those attributes (roundness and colorfulness) to build this amazing machine that automatically […]

The post Marble art madness from a marvelous machine appeared first on Arduino Blog.

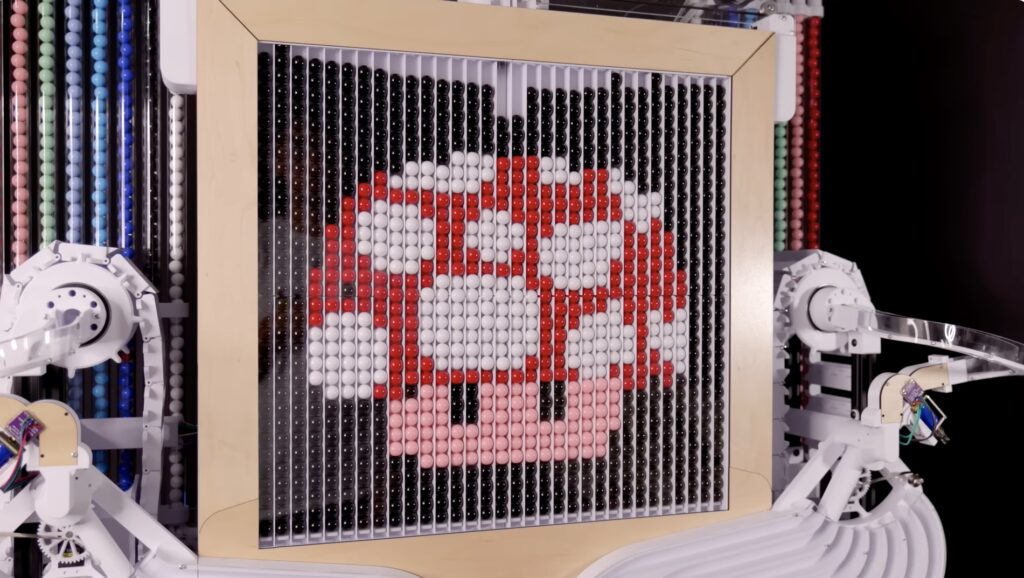
Marbles are underrated. They’re very round, roll well, tend to be pretty shiny, and come in all sorts of neat colors. That last characteristic makes them suitable for artwork, like orbicular pixels. In his most ambitious project to date, Engineezy took advantage of those attributes (roundness and colorfulness) to build this amazing machine that automatically produces marble art displays.

Engineezy has made a name for himself with his impressive and often complex mechanical design, and this project certainly fits that bill. It is enormous and the entire thing is basically a stack of fascinating mechanisms. There are mechanisms to separate the marbles by color (there are eight colors), elevator mechanisms to lift the marbles to the top of the sorters, pump mechanisms to move the sorted marbles up, feed mechanisms to drop the appropriate marbles into the displays area columns, and a mechanism to dump all the marbles from the bottom to start the process over.

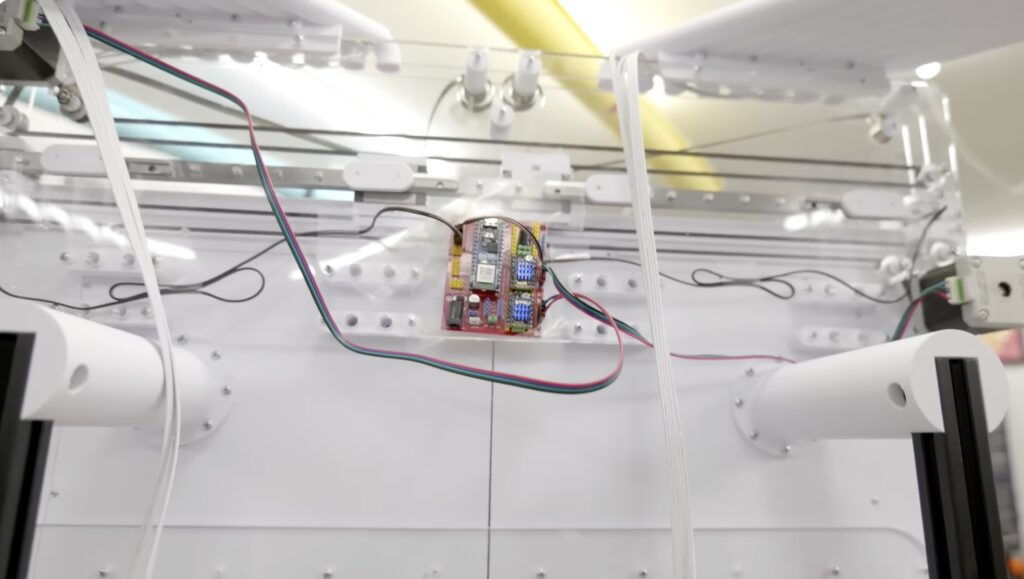
All of those mechanisms require a whole bunch of motors and drivers, along with several development boards to direct them. The feed mechanisms at the top, for example, operate under the control of an Arduino Nano ESP32. It oversees the movement of the two stepper motors that slide two guides back and forth — a design inspired by IDEX (Independent Dual-Extruder) 3D printers. Those use funnel-like ramps created by two coil springs that adapt to the movement — a rather ingenious idea.

The mechanisms all work in concert to drop the marbles into the display area, creating images of 32×32 pixels (1,024 “pixels” in total) and up to eight colors. The machine can automatically reset itself and then display a new image, so it can keep going indefinitely while spectators watch the intricate dance play out. 

The post Marble art madness from a marvelous machine appeared first on Arduino Blog.

An engineer’s journey to bring the ultimate TMJ pain relief tool to market

To the average person, invention and new product development seem like pretty straightforward processes; you come up with a killer idea, do the engineering work to cobble together a working prototype, have a truckload of units manufactured, and then sell those to turn a profit. But the reality is far, far more complicated than that. […]

The post An engineer’s journey to bring the ultimate TMJ pain relief tool to market appeared first on Arduino Blog.

To the average person, invention and new product development seem like pretty straightforward processes; you come up with a killer idea, do the engineering work to cobble together a working prototype, have a truckload of units manufactured, and then sell those to turn a profit. But the reality is far, far more complicated than that. However, Noam Aizenberg was able to ease some of the pain by turning to Arduino when he developed the myTMJ Pen.

The temporomandibular joint (TMJ) connects your jawbone to your skull and any disorders affecting it can cause a great deal of pain. Those disorders are surprisingly common and may affect as much as 12% of the human population, but there aren’t many good therapy solutions available to sufferers. As a TMJ patient himself, Aizenberg designed myTMJ Pen to provide relief.

As Aizenberg discovered, it takes a tremendous amount of work to bring a product to market — especially one designed for therapeutic use on the jaw muscles. myTMJ Pen combines pinpoint heat and massage, so Aizenberg also had to take safety into consideration. But Aizenberg is a recent mechanical engineering graduate and also has experience with Arduino development boards and the Arduino IDE, helping him to speed through prototype development.

The production myTMJ Pen will not contain an Arduino board, because space is at a tremendous premium. But Aizenberg did use the Arduino IDE to program the Microchip ATmega48 microcontroller that resides on the device’s custom PCB. That let Aizenberg take advantage of the familiar programming environment, the many available libraries, and the vast amount of documentation in the Arduino ecosystem.

For those interested in what it actually takes to bring a product to market, Aizenberg has documented every step of the process on his Instagram and YouTube channel

Aizenberg is currently seeking funding for the product launch on Indiegogo. Those funds will go towards everything from PCB fabrication to regulatory compliance testing.

The post An engineer’s journey to bring the ultimate TMJ pain relief tool to market appeared first on Arduino Blog.