An Arduino-powered robotic ukulele that plays itself

The ukulele has a bit of a reputation for being quaint, but it is a legitimate instrument like any other and that means it takes a lot of practice to play competently. Zeroshot is too busy building cool stuff to bother with all of that, so he put his skills to use constructing this robotic […]

The post An Arduino-powered robotic ukulele that plays itself appeared first on Arduino Blog.

The ukulele has a bit of a reputation for being quaint, but it is a legitimate instrument like any other and that means it takes a lot of practice to play competently. Zeroshot is too busy building cool stuff to bother with all of that, so he put his skills to use constructing this robotic ukulele that plays itself.

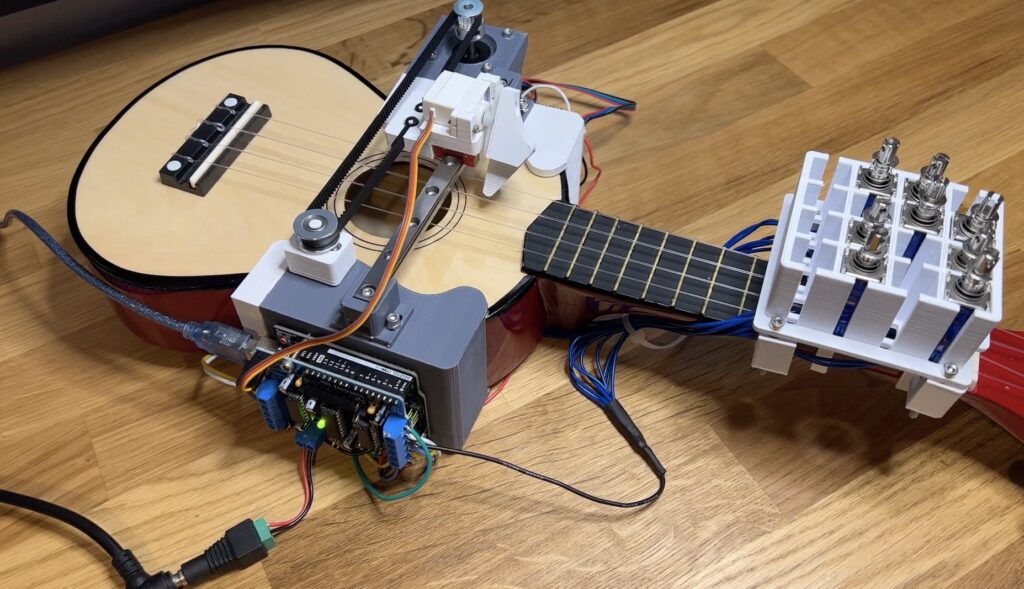
Like a guitarist, a ukulelist can play a note by strumming multiple strings at once or by picking individual strings. More exotic techniques are also possible, but uncommon and outside the scope of this project. The key to Zeroshot’s design is the mechanism that can both pick and strum. It does so by using two actuators: a servo motor to lift and drop the pick, and a stepper to slide the pick back and forth perpendicular to the strings.

An Arduino UNO Rev3 board controls those motors through a HiLetgo L293D motor shield, with a TMC2208 driver module for the stepper. The Arduino can lower the pick and strum it across all of the strings, or it can move to a specific string and pluck just that one. 

But it would be limited to only a handful of songs if it could only play open strings, so Zeroshot also needed to add hardware to hold the strings down on the fretboard. He chose solenoids for that job, held in a 3D-printed mount. With power coming from the motor shield, the Arduino can extend the solenoids to play any required notes.

Zeroshot designed the mount to accommodate up to 16 solenoids, for the first four frets across the four strings. When including open strings, that would give the robot up to 20 notes to work with. But a lot of songs only require a handful of solenoids, as Zeroshot demonstrated by performing Celine Dion’s “My Heart Will Go On.”

The post An Arduino-powered robotic ukulele that plays itself appeared first on Arduino Blog.
This UNO R4 WiFi-controlled device streamlines a restaurant’s online order system

Most successful restaurants operating today have to take advantage of online ordering, as a huge chunk of customers have switched to takeout and delivery. But point-of-sale (POS) systems don’t always integrate well into a kitchen’s workflow and that can lead to missed orders — one of the worst things a restaurant can do. To help […]

The post This UNO R4 WiFi-controlled device streamlines a restaurant’s online order system appeared first on Arduino Blog.
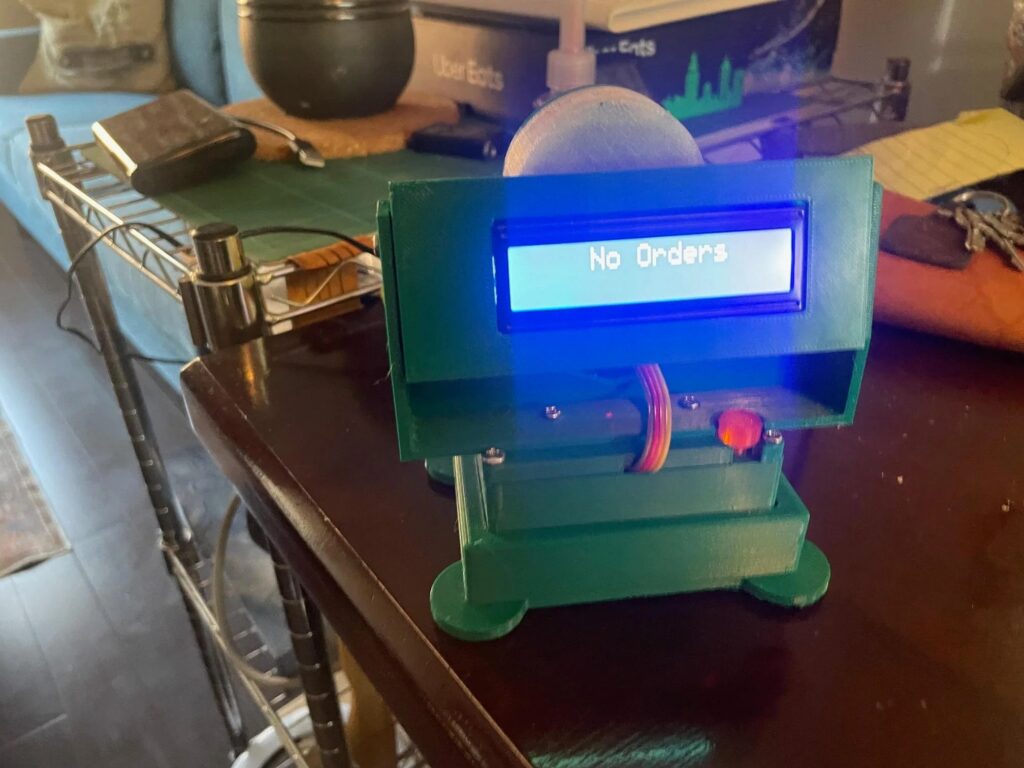
Most successful restaurants operating today have to take advantage of online ordering, as a huge chunk of customers have switched to takeout and delivery. But point-of-sale (POS) systems don’t always integrate well into a kitchen’s workflow and that can lead to missed orders — one of the worst things a restaurant can do. To help streamline a POS for a friend’s fried chicken takeout restaurant, Redditor UncleBobbyTO developed this affordable notification bot.

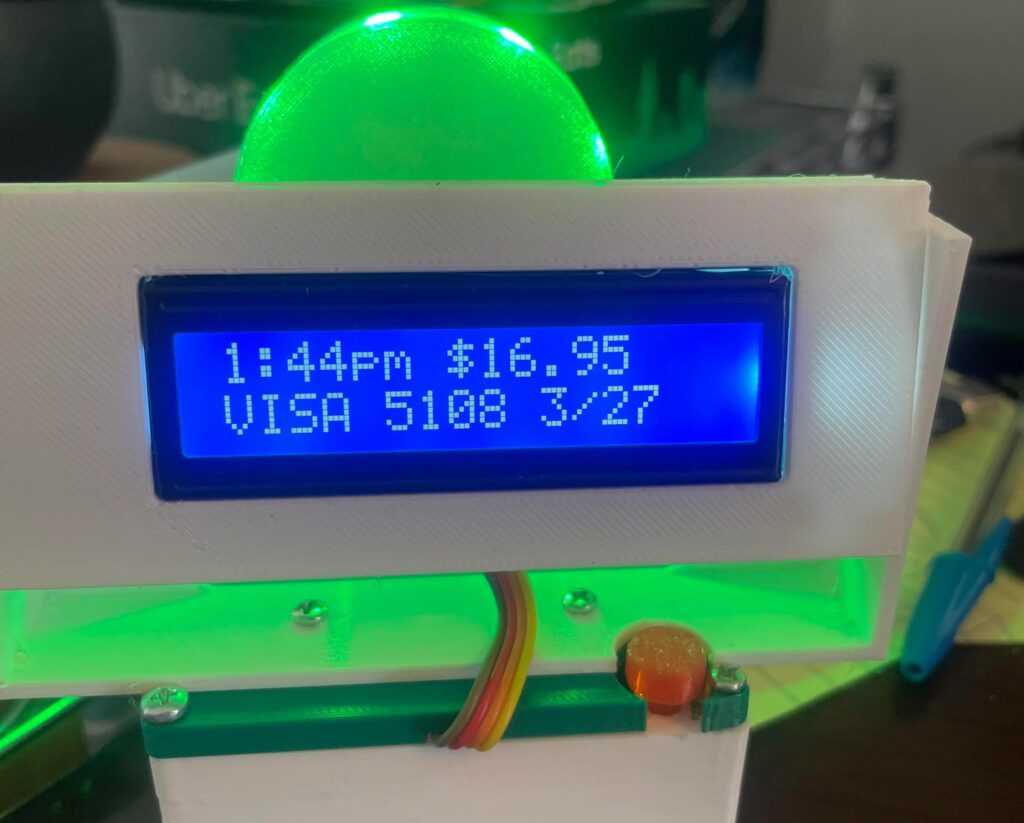
UncleBobbyTO’s friend uses a Square system in her restaurant, which has an online interface and sends an email for each new order. But the kitchen staff is busy and they sometimes fail to notice the emails. This device solves that problem. It can sit in the kitchen or by the expo window and connects to the Square API, checking for new orders every three minutes. When the device detects a new order, it lights up green and displays basic information about that transaction. Staff can then look up the order and press a button on the device to clear the notification.

That’s all possible because the device contains an Arduino UNO R4 WiFi board, which has built-in Wi-Fi capabilities that lets it connect to the internet and the Square API. It resides inside of a sturdy 3D-printed enclosure that also contains an RGB LED strip and a 16×2 character LCD screen. 

Now UncleBobbyTO’s friend can run her restaurant without worrying that staff might miss an order. 

The post This UNO R4 WiFi-controlled device streamlines a restaurant’s online order system appeared first on Arduino Blog.
Reimagining the chicken coop with predator detection, Wi-Fi control, and more

The traditional backyard chicken coop is a very simple structure that typically consists of a nesting area, an egg-retrieval panel, and a way to provide food and water as needed. Realizing that some aspects of raising chickens are too labor-intensive, the Coders Cafe crew decided to automate most of the daily care process by bringing […]

The post Reimagining the chicken coop with predator detection, Wi-Fi control, and more appeared first on Arduino Blog.
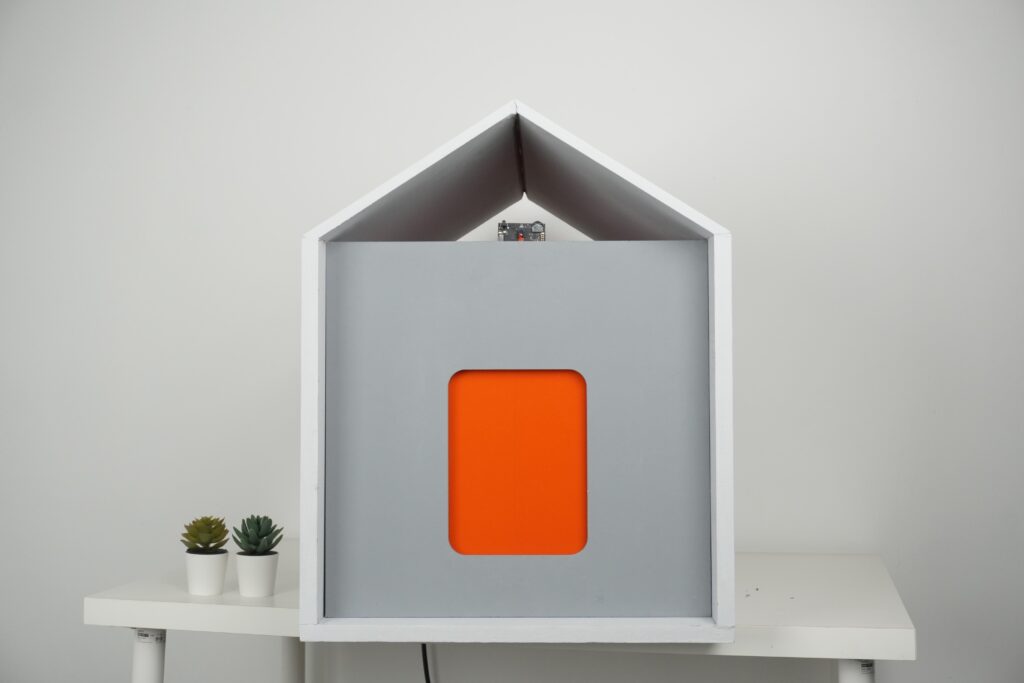
The traditional backyard chicken coop is a very simple structure that typically consists of a nesting area, an egg-retrieval panel, and a way to provide food and water as needed. Realizing that some aspects of raising chickens are too labor-intensive, the Coders Cafe crew decided to automate most of the daily care process by bringing some IoT smarts to the traditional hen house.

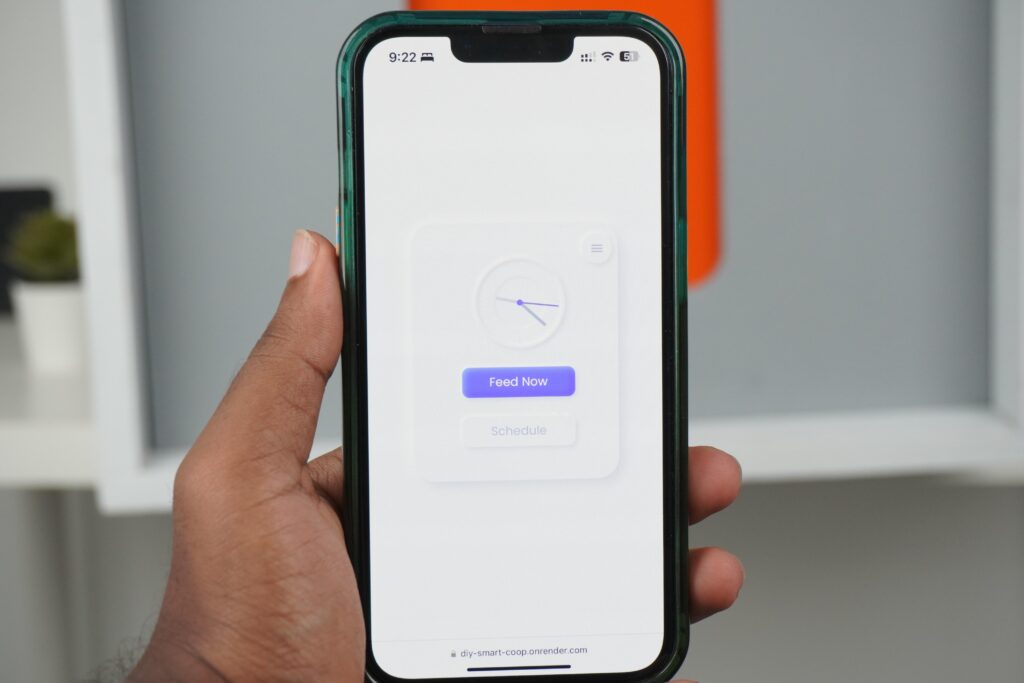
Controlled and actuated by an Arduino UNO R4 WiFi and a stepper motor, respectively, the front door of the coop relies on a rack-and-pinion mechanism to quickly open or close at the scheduled times. After the chickens have entered the coop to rest or lay eggs, they can be fed using a pair of fully-automatic dispensers. Each one is a hopper with a screw at the bottom which pulls in the food with the help of gravity and gently distributes it onto the ground. And similar to the door, feeding chickens can be scheduled in advance through the team’s custom app and the UNO R4’s integrated Wi-Fi chipset.

The last and most advanced feature is the AI predator detection system. Thanks to a DFRobot HuskeyLens vision module and its built-in training process, images of predatory animals can be captured and leveraged to train the HuskyLens for when to generate an alert. Once an animal has been detected, it tells the UNO R4 over I2C, which in turn, sends an SMS message via Twilio.

More details about the project can be found in Coders Cafe’s Instructables writeup.

The post Reimagining the chicken coop with predator detection, Wi-Fi control, and more appeared first on Arduino Blog.
Adjusting office chair height with simple voice commands

A month ago, ElectronicLab modified his office chair with an electric car jack, giving it motorized height adjustment. That worked well, but required that he push buttons to raise or lower the seat. Pushing those buttons is a hassle when one’s hands are full, so ElectronicLab went back to the workbench to add voice control […]

The post Adjusting office chair height with simple voice commands appeared first on Arduino Blog.
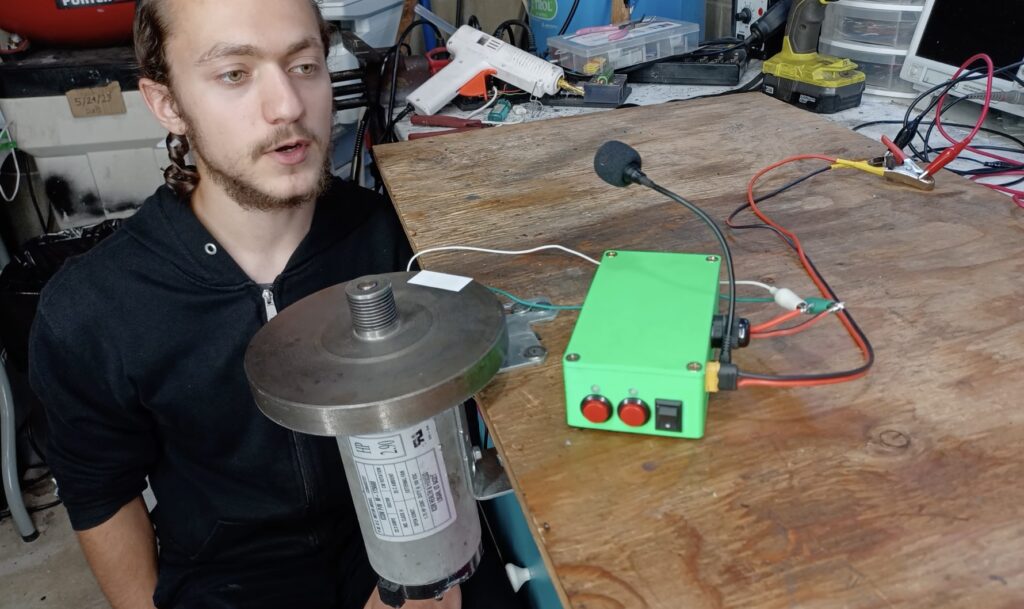
A month ago, ElectronicLab modified his office chair with an electric car jack, giving it motorized height adjustment. That worked well, but required that he push buttons to raise or lower the seat. Pushing those buttons is a hassle when one’s hands are full, so ElectronicLab went back to the workbench to add voice control capabilities.

ElectronicLab was using an Arduino Nano to control the electric jack motor in response to button presses, so he already had most of the hardware necessary to make the system smarter. He just needed the Arduino to recognize specific voice commands, which he was able to achieve using an ELECHOUSE Voice Recognition Module V3.

That voice recognition modules supports up to 80 voice commands, but ElectronicLab only needed a few of them — just enough to tell the chair which direction to move and how far to go. The module came with a microphone, which ElectronicLab was able to attach outside of the 3D-printed enclosure where it could pick up his voice.

But there was still one problem: the movement was very slow. The jack was designed to lift a car, so it uses a high-torque motor with a 10:1 planetary gearset to drive a hydraulic pump. ElectronicLab didn’t need that much torque, so he welded the planetary gears to give the motor a direct 1:1 ratio. Sadly, that was a mistake. The hydraulic oil can’t flow fast enough to keep up, so the motor pulls way too much current for the driver.

Still, the voice control was a success and so ElectronicLab can simply swap out the motor.

Perhaps in the future ElectronicLab can even consolidate the components using the speech recognition-capable Nano 33 BLE Sense Rev2 or Nano RP2040 Connect

The post Adjusting office chair height with simple voice commands appeared first on Arduino Blog.
Making fire detection more accurate with ML sensor fusion

The mere presence of a flame in a controlled environment, such as a candle, is perfectly acceptable, but when tasked with determining if there is cause for alarm solely using vision data, embedded ML models can struggle with false positives. Solomon Githu’s project aims to lower the rate of incorrect detections with a multi-input sensor fusion technique […]

The post Making fire detection more accurate with ML sensor fusion appeared first on Arduino Blog.
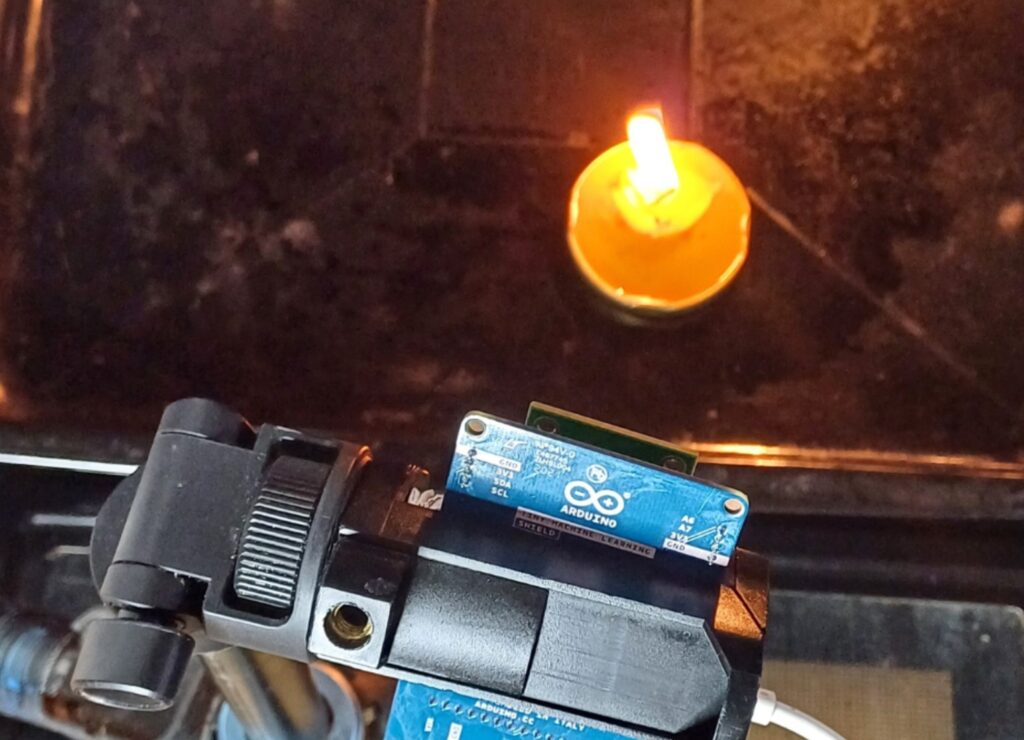
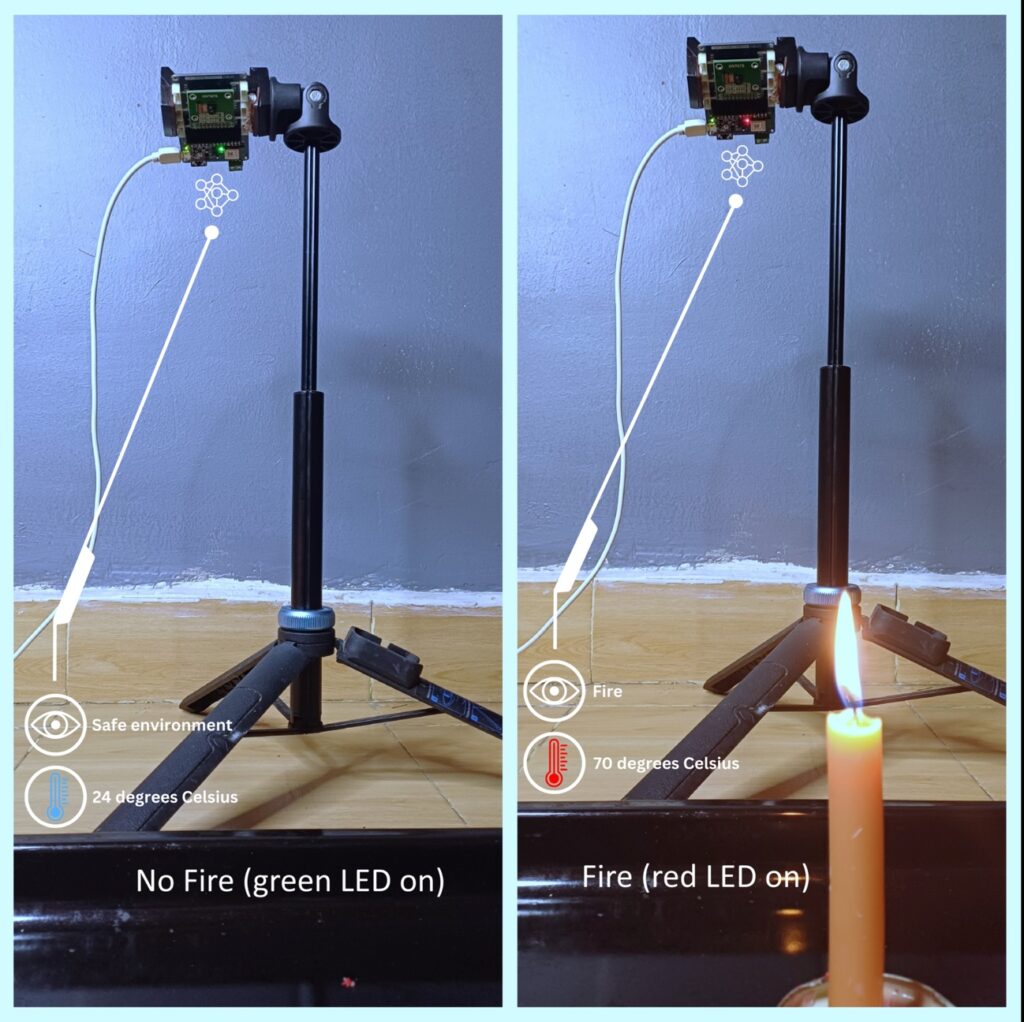
The mere presence of a flame in a controlled environment, such as a candle, is perfectly acceptable, but when tasked with determining if there is cause for alarm solely using vision data, embedded ML models can struggle with false positives. Solomon Githu’s project aims to lower the rate of incorrect detections with a multi-input sensor fusion technique wherein image and temperature data points are used by a model to alert if there’s a potentially dangerous blaze.

Gathering both kinds of data is the Arduino TinyML Kit’s Nano 33 BLE Sense. Using the kit, Githu could capture a wide variety of images thanks to the OV7675 camera module and temperature information with the Nano 33 BLE Sense’s onboard HTS221 sensor. After exporting a large dataset of fire/fire-less samples alongside a range of ambient temperatures, he leveraged Google Colab to train the model before importing it into the Edge Impulse Studio. In here, the model’s memory footprint was further reduced to fit onto the Nano 33 BLE Sense.

The inferencing sketch polls the camera for a new frame, and once it has been resized, its frame data, along with a new sample from the temperature sensor, are merged and sent through the model which outputs either “fire” or “safe_environment”. As detailed in Githu’s project post, the system accurately classified several scenarios in which a flame combined with elevated temperatures resulted in a positive detection.

The post Making fire detection more accurate with ML sensor fusion appeared first on Arduino Blog.
Explore underwater with this Arduino-controlled DIY ROV

Who doesn’t want to explore underwater? To take a journey beneath the surface of a lake or even the ocean? But a remotely operated vehicle (ROV), which is the kind of robot you’d use for such an adventure, isn’t exactly the kind of thing you’ll find on the shelf at your local Walmart. You can, […]

The post Explore underwater with this Arduino-controlled DIY ROV appeared first on Arduino Blog.
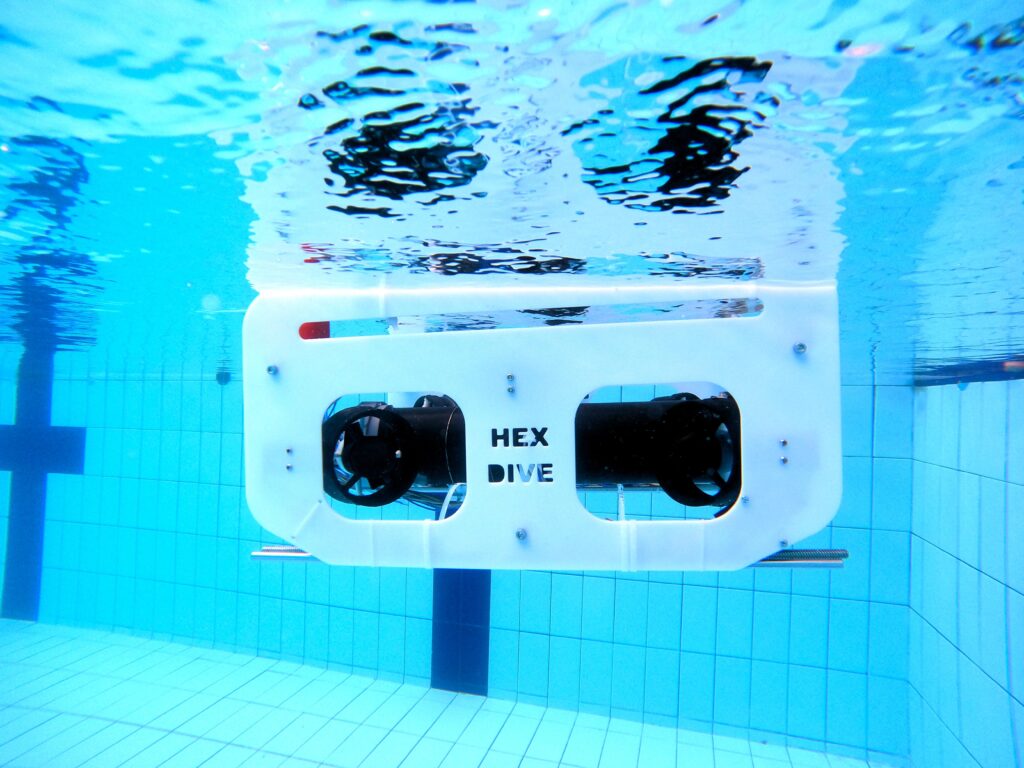
Who doesn’t want to explore underwater? To take a journey beneath the surface of a lake or even the ocean? But a remotely operated vehicle (ROV), which is the kind of robot you’d use for such an adventure, isn’t exactly the kind of thing you’ll find on the shelf at your local Walmart. You can, however, follow this guide from Ranuga Amarasinghe to build your own ROV for some aquatic fun.

Amarasinghe is a 16-year-old Sri Lankan student and this is actually the second iteration of his ROV design. As such, he’s dubbed it “ROV2” and it appears to be quite capable. All of its electronics sit safely within a 450mm length of sealed PVC tube. That mounts onto the aluminum extrusion frame structure that also hosts the six thrusters powered by drone-style brushless DC motors. 

ROV2’s brain is an Arduino Mega 2560 board and it drives the BLDC motors through six electronic speed controllers (ESCs). It receives control commands from the surface via an umbilical. The operator holds a Flysky transmitter that sends radio signals to a receiver floating on the water. An Arduino UNO Rev3 reads those and then communicates the motor commands to the Mega through the tethered serial connection. That limits the maximum length of the tether to about 40 meters, which subsequently limits the maximum operating depth. 

With the specified lithium battery pack, ROV2 can traverse the depths for 30-45 minutes. And when equipped with the 720p FPV camera, pilots can see and record all of the underwater action. 

The post Explore underwater with this Arduino-controlled DIY ROV appeared first on Arduino Blog.

Making a car more secure with the Arduino Nicla Vision

Shortly after attending a recent tinyML workshop in Sao Paolo, Brazil, Joao Vitor Freitas da Costa was looking for a way to incorporate some of the technologies and techniques he learned into a useful project. Given that he lives in an area which experiences elevated levels of pickpocketing and automotive theft, he turned his attention to […]

The post Making a car more secure with the Arduino Nicla Vision appeared first on Arduino Blog.

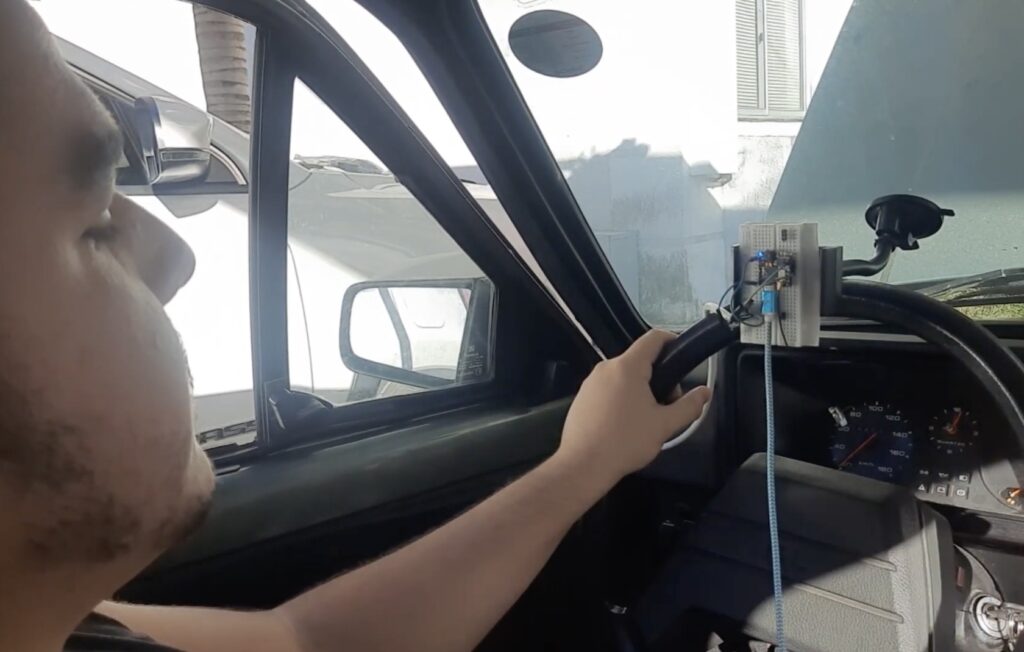
Shortly after attending a recent tinyML workshop in Sao Paolo, Brazil, Joao Vitor Freitas da Costa was looking for a way to incorporate some of the technologies and techniques he learned into a useful project. Given that he lives in an area which experiences elevated levels of pickpocketing and automotive theft, he turned his attention to a smart car security system.

His solution to a potential break-in or theft of keys revolves around the incorporation of an Arduino Nicla Vision board running a facial recognition model that only allows the vehicle to start if the owner is sitting in the driver’s seat. The beginning of the image detection/processing loop involves grabbing the next image from the board’s camera and sending it to a classification model where it receives one of three labels: none, unknown, or Joao, the driver. Once the driver has been detected for 10 consecutive seconds, the Nicla Vision activates a relay in order to complete the car’s 12V battery circuit, at which point the vehicle can be started normally with the ignition.

Through this project, da Costa was able to explore a practical application of vision models at-the-edge to make his friend’s car safer to use. To see how it works in more detail, you can check out the video below and delve into the tinyML workshop he attended here.

The post Making a car more secure with the Arduino Nicla Vision appeared first on Arduino Blog.

Patrol the pool with this Arduino Nano-powered DIY RC submarine

There is something inherently intriguing about submarines that doesn’t seem to apply to other vehicles. Maybe that reflects our natural fears and phobias, or maybe it is a result of our curiosity about the mysterious depths. Maybe it is simply that most of us will never get the chance to ride in a submarine. But […]

The post Patrol the pool with this Arduino Nano-powered DIY RC submarine appeared first on Arduino Blog.

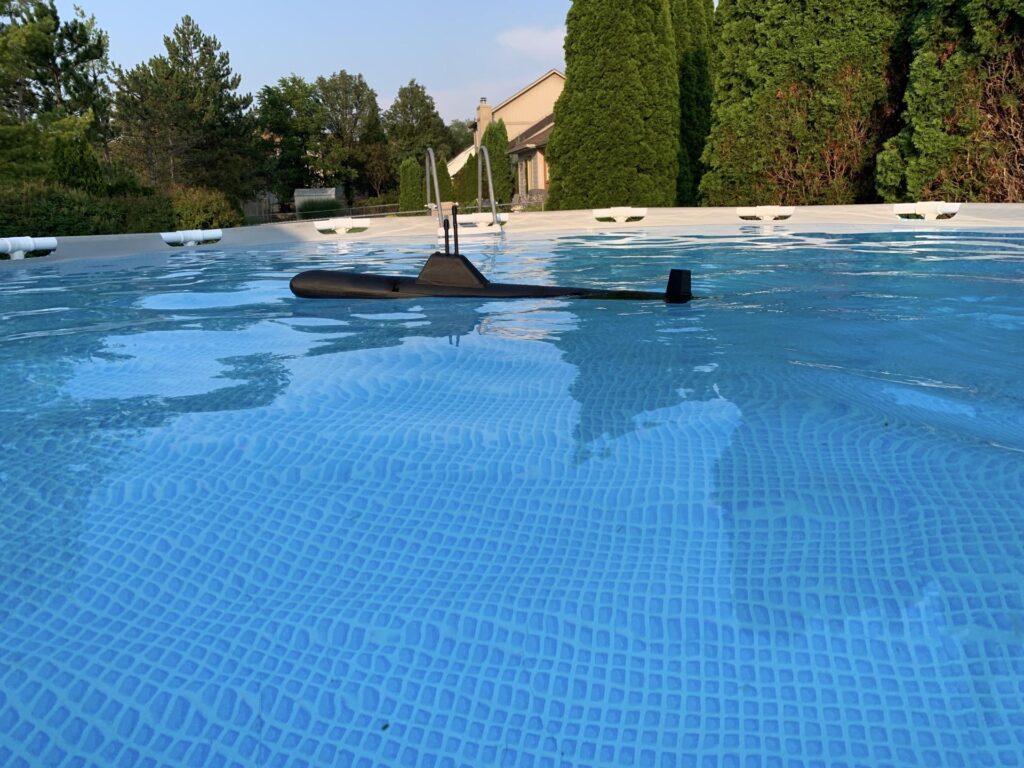
There is something inherently intriguing about submarines that doesn’t seem to apply to other vehicles. Maybe that reflects our natural fears and phobias, or maybe it is a result of our curiosity about the mysterious depths. Maybe it is simply that most of us will never get the chance to ride in a submarine. But you can get some of the experience with a model, like 15-year-old Ben Kennedy did with this DIY RC submarine.

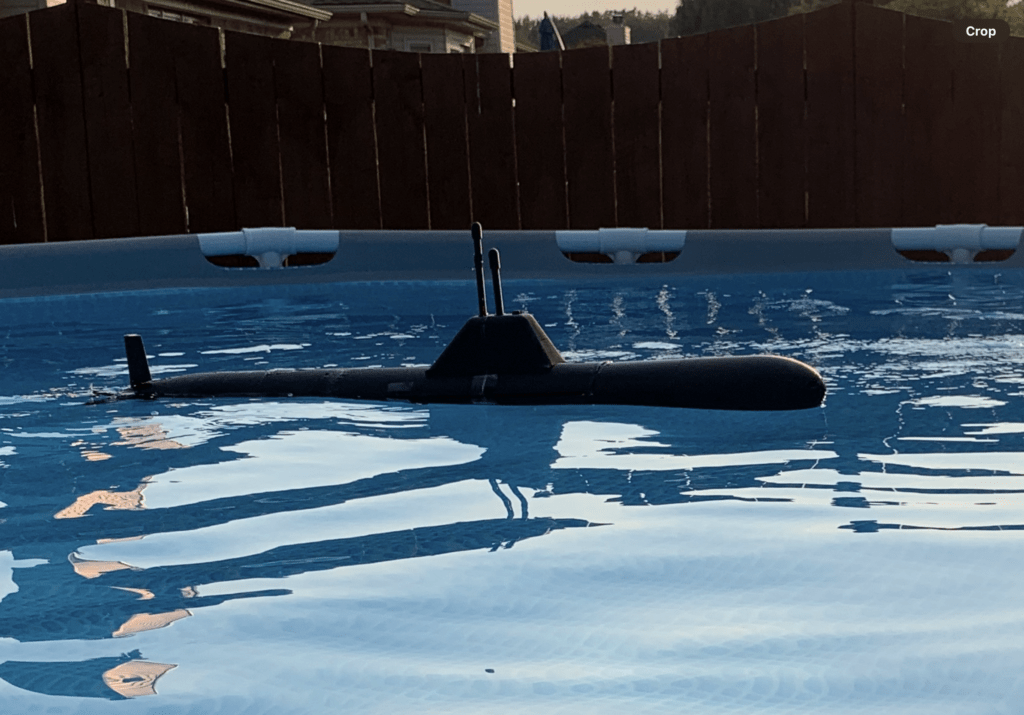
This is a remote-controlled submarine built entirely from scratch and it is very impressive. It is a 500mm-long vessel loosely modeled after the Soviet (and now Russian) Akula-class submarine. But the resemblance is entirely superficial, as the Kennedy’s design is 100% original. 

The hull and most of the rest of the parts were modeled in Autodesk Fusion 360 and then 3D-printed. An Arduino Nano board receives radio signals from a Flysky FS-i6X transmitter controller via a Flysky iA10B receiver. The Arduino then controls the various systems that allow the submarine to move through the water.

Four small aquarium pumps move water in and out of the ballast tanks to control buoyancy. A single brushless DC motor, which is naturally waterproof, provides thrust. Two waterproof MG995 servo motors actuate the rudders for yaw and pitch, which are necessary for diving/surfacing and steering. Most of the hull isn’t watertight, so Kennedy placed a waterproof plastic bag inside the hull to protect the Arduino and the lithium battery that provides power. 

Kennedy tested the sub in his family’s backyard pool and it seems to have performed nicely. He posted his design files and code, so anyone can build their own RC submarine. 

The post Patrol the pool with this Arduino Nano-powered DIY RC submarine appeared first on Arduino Blog.

A miniature Vegas Sphere is the perfect nightlight

Sphere in Las Vegas is inarguably one of the most notable architectural achievements of the 21st century so far. Gaudy? Maybe. Controversial? Definitely. Interesting? Absolutely — no one can debate that with a straight face. When 15-year-old Ben Kennedy’s bedroom nightlight broke, he decided to use the Sphere as the inspiration for this DIY LED nightlight. […]

The post A miniature Vegas Sphere is the perfect nightlight appeared first on Arduino Blog.

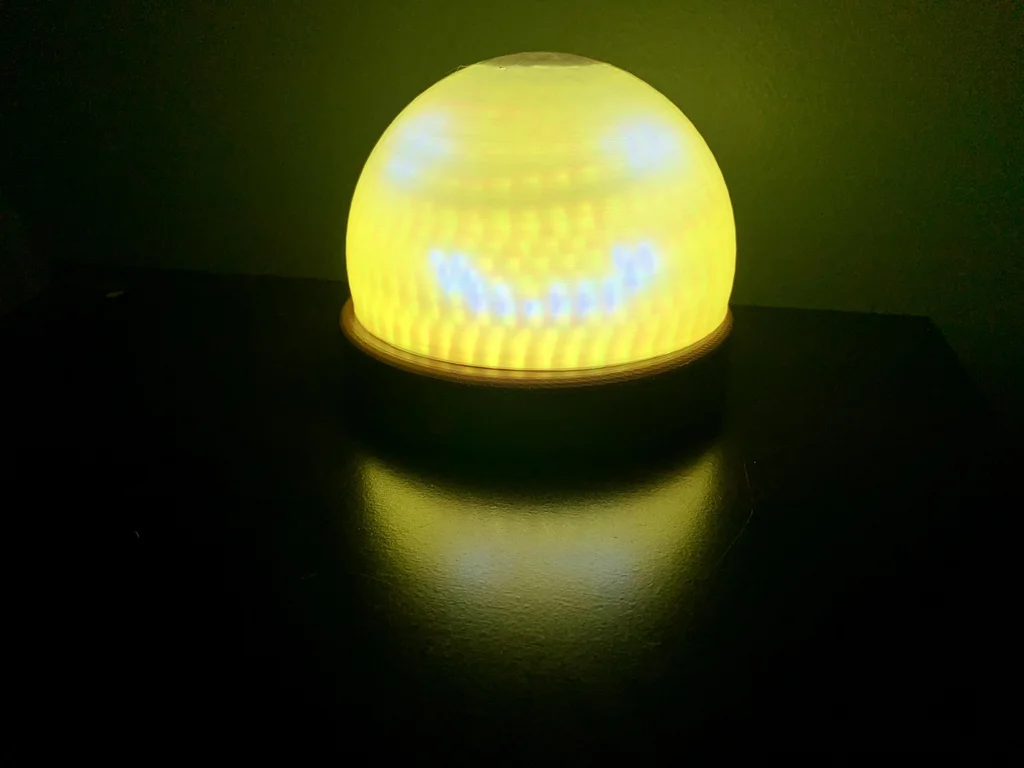
Sphere in Las Vegas is inarguably one of the most notable architectural achievements of the 21st century so far. Gaudy? Maybe. Controversial? Definitely. Interesting? Absolutely — no one can debate that with a straight face. When 15-year-old Ben Kennedy’s bedroom nightlight broke, he decided to use the Sphere as the inspiration for this DIY LED nightlight.

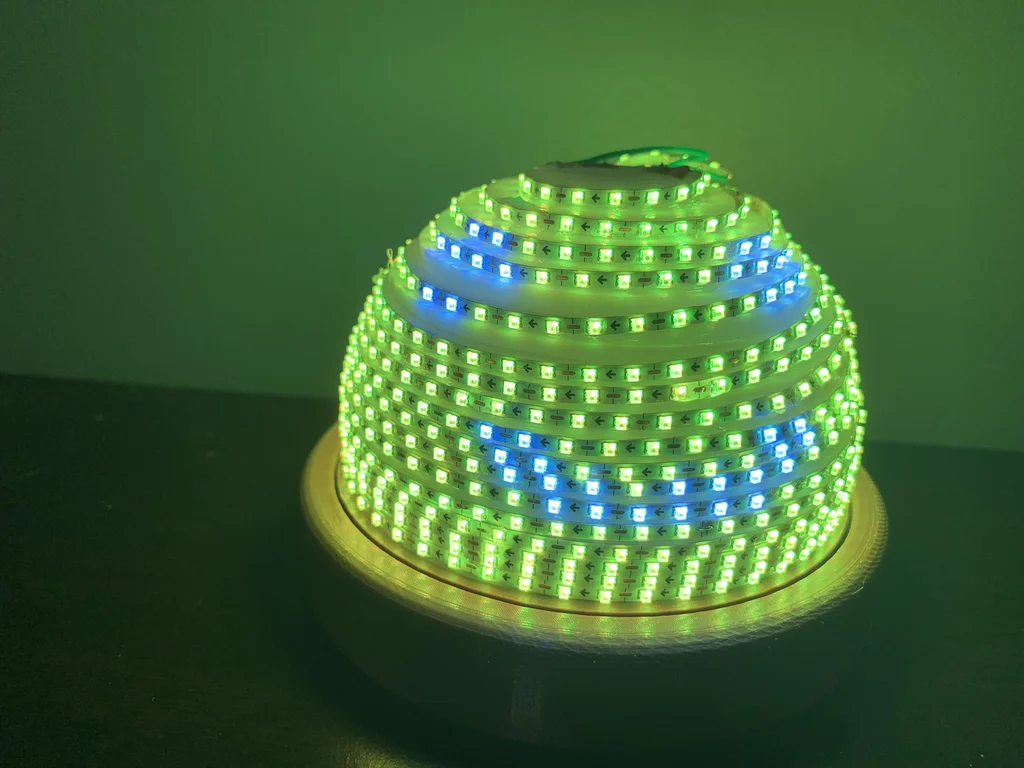
Like Sphere at the Venetian Resort, Kennedy’s nightlight is a spherical display. It may only be a few inches tall, but it has a whopping 800 LEDs underneath the translucent outer shell. Those are WS2812b individually addressable RGB LEDs, so each can be set to a unique color and brightness independent of its neighbors. It is, in essence, an LED screen wrapped around a three-dimensional ball.

Inside the outer shell is a 3D-printed frame, designed in Fusion 360, onto which Kennedy glued the LED strips. That frame has a kind of tiered structure to match the shape of the sphere. The outer diffuser shell and base were also 3D-printed. An Arduino Nano Every board controls the LEDs using the popular FastLED library, which is ideal for animating a large number of LEDs like this. Those naturally draw a lot of power, so Kennedy purchased a beefy 5V 15A power supply.

To swap between colors and animations, Kennedy reused the infrared remote that came with his old nightlight. He attached an infrared receiver to the Arduino and recorded the codes sent by that remote, then associated them with specific colors and effects in his sketch. He even used potentiometers to dial-in specific hues so they perfectly match the buttons on the remote

The post A miniature Vegas Sphere is the perfect nightlight appeared first on Arduino Blog.

Web Serial Camera stream with Arduino

Hey there, fellow tech enthusiasts! Ever wondered how you could effortlessly stream camera footage from your Arduino boards directly to your web browser? Wonder no more! Arduino’s Web Serial Camera demo shows how to bring your camera projects to life. Stream images from your Arduino boards Arduino hardware like the Nicla Vision and Portenta Vision […]

The post Web Serial Camera stream with Arduino appeared first on Arduino Blog.

Hey there, fellow tech enthusiasts! Ever wondered how you could effortlessly stream camera footage from your Arduino boards directly to your web browser? Wonder no more! Arduino’s Web Serial Camera demo shows how to bring your camera projects to life.

Stream images from your Arduino boards

Arduino hardware like the Nicla Vision and Portenta Vision Shield has democratized accessibility to camera data on embedded systems. On the mission to simplify processing camera images, we are excited to introduce a new cross-platform approach to reading video streams over the serial port. This Web Serial-based advancement is more streamlined and user-friendly than previous methods, which required the installation of additional software and manual configuration.

Requirements

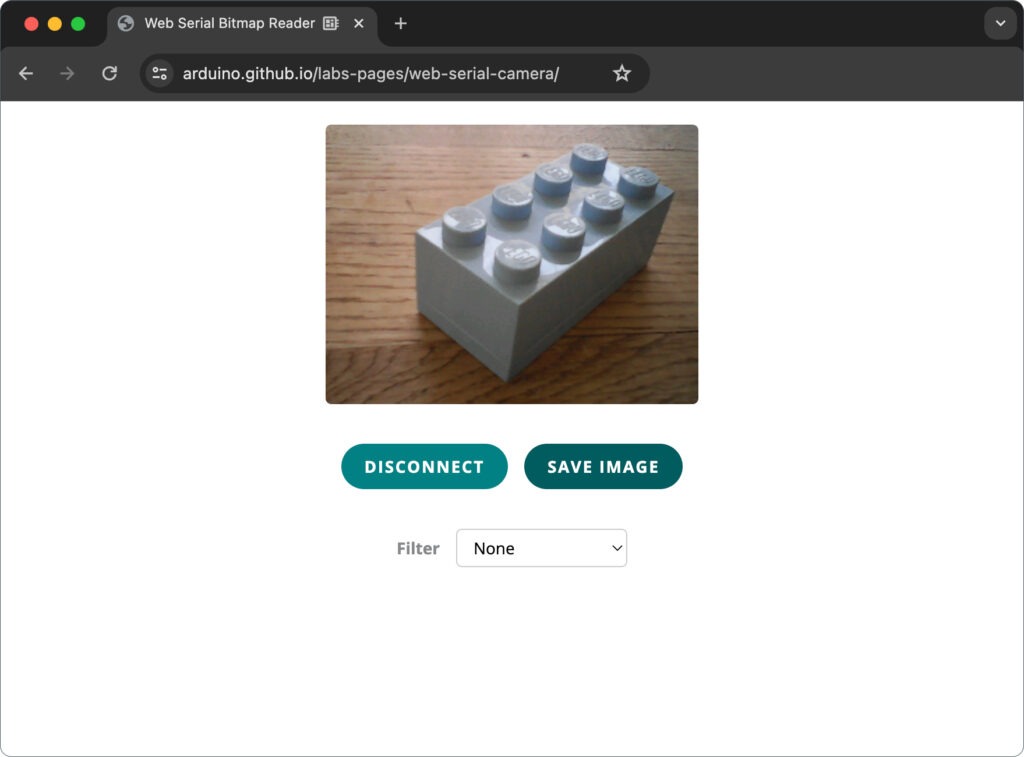
The Web Serial Camera web application enables you to connect Arduino boards equipped with a camera and stream their images straight to your browser. At the time of writing, these include the Portenta H7 + Portenta Vision Shield, Nicla Vision, and GIGA R1 WiFi + OV7675, OV7670, GC2145, HM0360 or HM01B0 camera. All it takes is one of these mentioned boards, an Arduino sketch, and a browser that supports Web Serial.

Unpacking the demo

Connectivity: Experience the magic of the Web Serial technology as you seamlessly connect your Arduino hardware to web applications. Enjoy easy data transfer between your board and the browser.

Image processing: Step into the world of image data processing with JavaScript. The example shows how to process and transform the raw image data from your Arduino board so that it can be displayed in the browser.

Image filters: Learn how to implement basic image filters. From adjusting brightness to applying a sepia effect, you’ll discover how simple it is to transform your images right in your browser. While exploring these filters you’ll gain a deeper understanding of how to manipulate pixels and breathe life into your visuals.

Image download: Frames from the camera stream can be downloaded with the click of a button. This makes it easy to use the camera images for further processing such as training a machine learning model for image classification.

How to get started

1. Upload the Arduino sketch: Visit our dedicated page to access the “CameraCaptureWebSerial” sketch. Simply upload the Arduino sketch to your compatible board using the Arduino IDE or the Arduino CLI.

2. Access the web application: Visit the link to the web application as described on the page mentioned above to access the Web Serial Camera web application. Click “connect”, select your board and confirm the selection.

3. Start experimenting: Dive into the world of real-time imaging in the browser and let your creativity flow.

Are you ready?

The Web Serial-based solution for video streaming on Arduino boards is an effective and adaptable tool for prototyping camera-based applications. Head over to our website and start tinkering today!

We can’t wait to see what you come up with! Share your experiences and creations on social media, and be sure to tag us!

The post Web Serial Camera stream with Arduino appeared first on Arduino Blog.